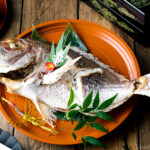
Japanese Baked Sea Bream
Seasoned with salt and baked till crisp on the skin and juicy inside, this Japanese Baked Sea Bream is often served on celebratory occasions, including Oshogatsu (Japanese New Year). The whole fish will make a stunning centerpiece of your feast. I'll show you how to cook it perfectly every time!
Servings: 4
Calories: 225kcal
Ingredients
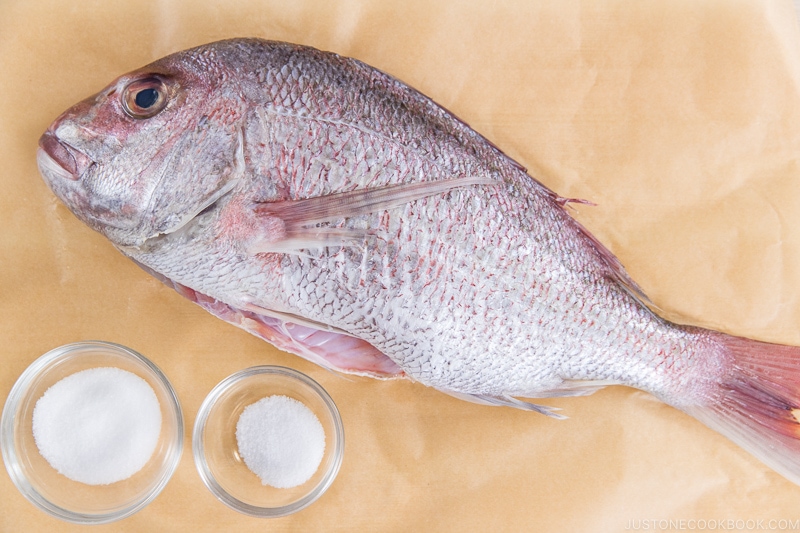
- 1 red sea bream (madai 真鯛; this is a 3-lb, 17-inch-long fish; after gutted, 2.8 lb)
- 1 ½ tsp kosher/sea salt (I use Diamond Crystal; use half for table salt) (You’ll need ½ tsp salt per pound)
- 2 Tbsp kosher/sea salt (I use Diamond Crystal; use half for table salt) (for sprinkling fins and tail)
Instructions
- Gather all the ingredients.
To Prepare the Fish
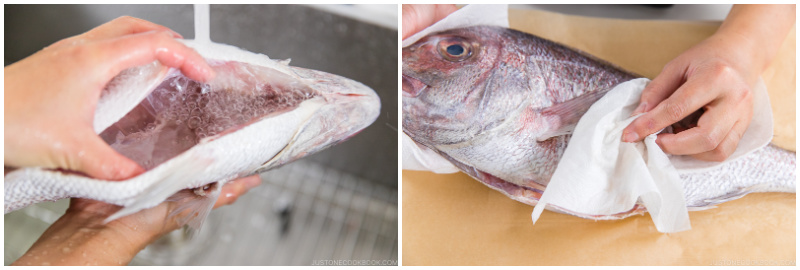
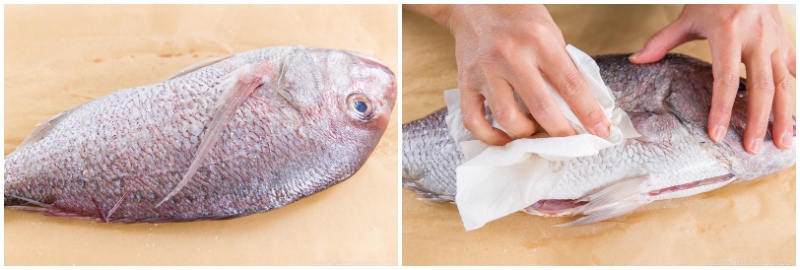
- Rinse the fish, both inside and outside, under cold water. Pat dry with paper towels.
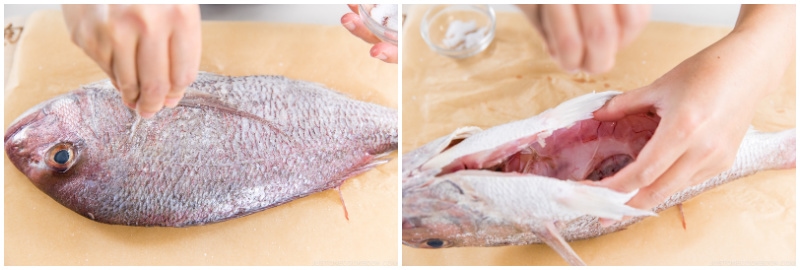
- Sprinkle salt all over the fish and inside the fish. Why salting? Please read the blog post on why salting is important. Let stand for 30 minutes on the kitchen counter.
- After 30 minutes, preheat the oven to 425ºF (220ºC). For a convection oven, reduce cooking temperature by 25ºF (15ºC). Pat dry all the moisture oozed out from the fish with paper towels.
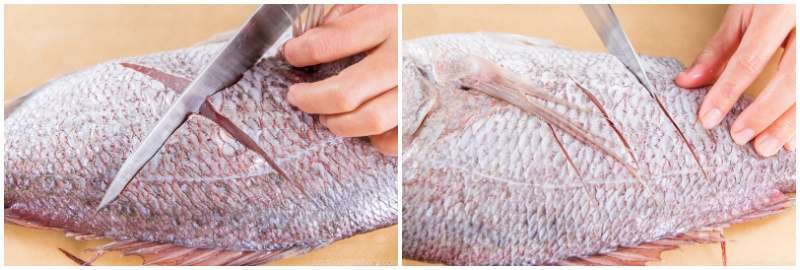
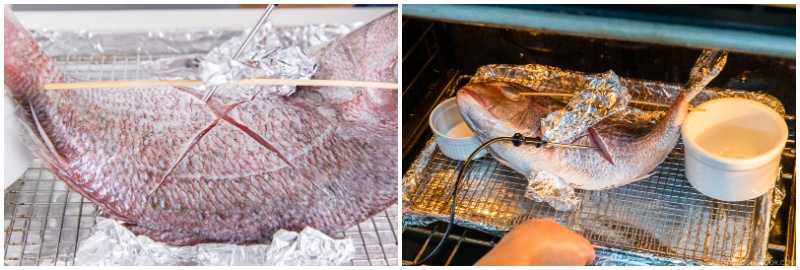
- Score the thickest part of the flesh. Score an X on the front (fish head pointing left). Make 2-3 slashes on the back (fish head pointing right). The depth of slashes is usually midway between the skin and the bone, just enough to opening up the flesh for the heat to get through the flesh more efficiently. Read more about it in the blog post.
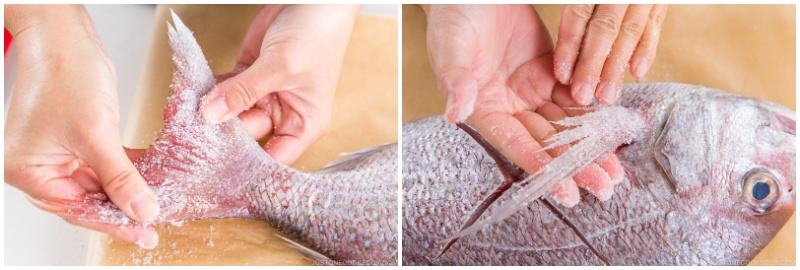
- Coat the fins (3 locations) and tail with salt to prevent them from burning. Spread them when sprinkling salt and press down with fingers.
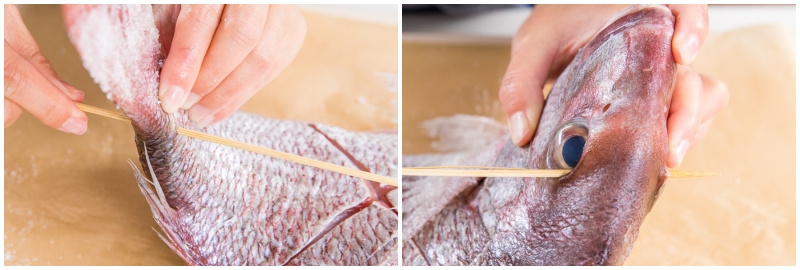
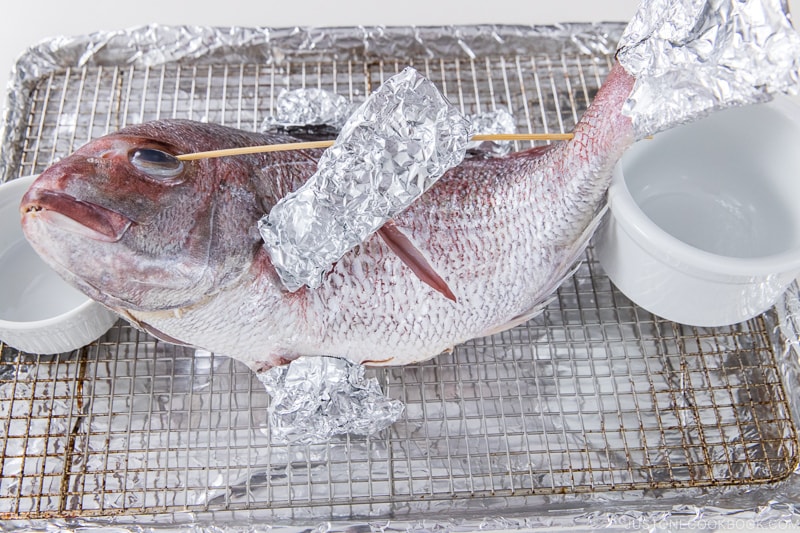
- Find a pointy object like an ice pick (I use a takoyaki pick), make a puncture near the tail so a bamboo skewer can go through (Unfortunately, a bamboo skewer is not strong enough to puncture through the fish).
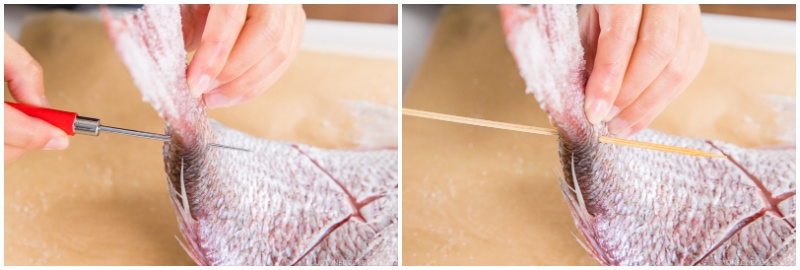
- Insert the bamboo skewer through the hole in the tail then puncture through the upper eyes.
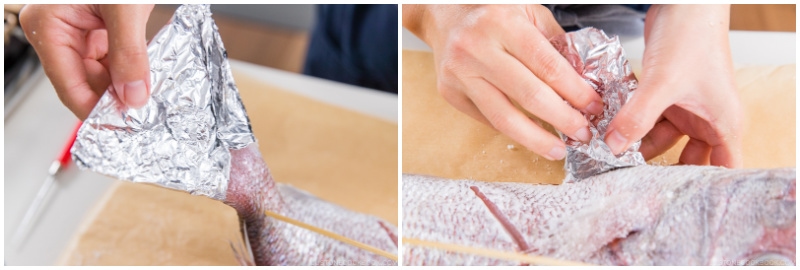
- Cover the tail and fins with aluminum foil.
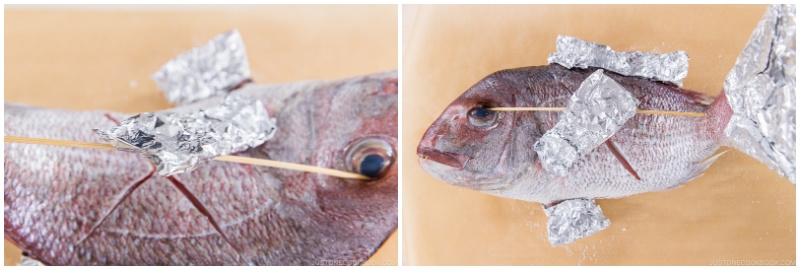
- Put the foil-wrapped pectoral fin on the bamboo so that it will stand up after being baked.
- Place the fish on the wire rack (so the air would go through underneath the fish). Put the oven-safe ramekins to support the head and tail.
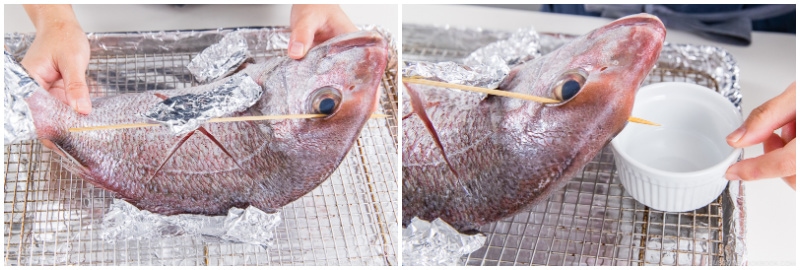
- Here’s the closer look.
To Bake
- Insert the oven probe into the thickest part of the flesh (through the score). Transfer the baking sheet to the oven and attach the probe to the oven.
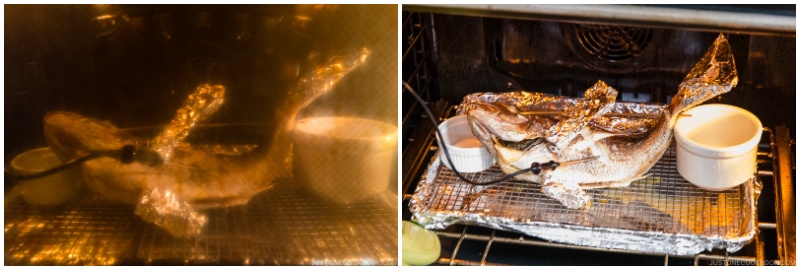
- Bake the fish at 425ºF (220ºC) until the thickest part of the fish registers 145°F (63°C) on the oven meat probe or on an instant-read thermometer, about 40-45 minutes (for a 3-lb fish).
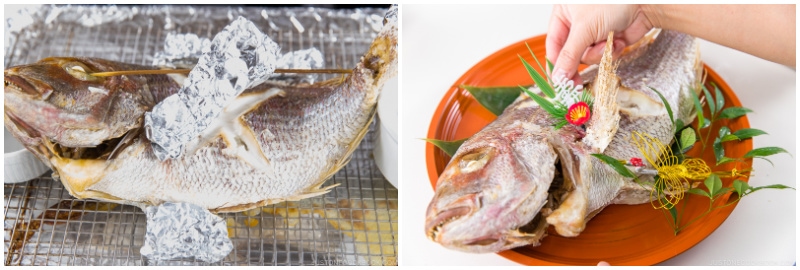
- Remove from the oven. Take out the skewer and the aluminum foil (be careful as the fins and tail may be stuck to the foil). Decorate the fish (read the blog post for some ideas) and serve immediately.
To Store
- You can store the leftover in an airtight container in the refrigerator for up to 3 days.
To Use Leftover Fish (Bone and Flesh)
- Make Tai Meshi (Sea Bream Rice) following my recipe.
Notes
Recipe by Namiko Chen of Just One Cookbook. All images and content on this site are copyright protected. Please do not use my images without my permission. If you’d like to share this
